
You are using an out of date browser. It may not display this or other websites correctly.
You should upgrade or use an alternative browser.
You should upgrade or use an alternative browser.
Sy #2875 Build :eh:
- Thread starter Maple Syrup
- Start date
Blazerspeed
New member
Re: Sy #2875 Build :eh:
Looks great, and can't wait to see how it progresses. Keep up the great work!
Looks great, and can't wait to see how it progresses. Keep up the great work!
Maple Syrup
Canadian Bacon Breath
Re: Sy #2875 Build :eh:
Thanks
I've got my new rotors and calipers sitting in boxes, you'll be seeing them in a few weeks. not sure what i'll be doing with the camaro rolling chassis once the motor is pulled.
Thanks Tom, Hope so!
The sliding rear window is what your reffering to I assume? I've already aquired a smooth non-sliding rear window, sadly it isn't a factory syclone window
My father started, owns and oparates a few body shops (family business). Went to school for the last 5 years to hopefully one day purchase and continue with the business, However I've been working for him for the last 7+ years. Tricks of the trade have helped me alot with this project and others aswell.
Thanks Renz, suprisingly I havn't been crushin many units while building this truck...
I sware its the truth.
Thanks for the love, I'm excited too! I hope it turns out how I have visioned it.
Yeah, I believe that there is no way to cover the vent area of the dash with the dye while the front window is intact. And I don't plan on pulling the dash out until next winter so that is why it was so important to spray it in the few days that had time to.
impressive work Sir.
Thanks
Need to yank the LS1 brakes off that donor & get 'em on your truck:tup:
I've got my new rotors and calipers sitting in boxes, you'll be seeing them in a few weeks. not sure what i'll be doing with the camaro rolling chassis once the motor is pulled.
Nice work Ty! Moving this thing right along! Should be an awesome truck.
Thanks Tom, Hope so!
Whats with the back window on that thing.
You are cruisin!!!
The sliding rear window is what your reffering to I assume? I've already aquired a smooth non-sliding rear window, sadly it isn't a factory syclone window
Do you own a body shop? Looks like you've got the tools and the skills! Great work - can't wait to see the outcome.
Subscribed :tup:
My father started, owns and oparates a few body shops (family business). Went to school for the last 5 years to hopefully one day purchase and continue with the business, However I've been working for him for the last 7+ years. Tricks of the trade have helped me alot with this project and others aswell.
looking good, crushin units....
i made the Virginia 4x4 sticker that's on that thing!
Thanks Renz, suprisingly I havn't been crushin many units while building this truck...
I sware its the truth.
Looks great, and can't wait to see how it progresses. Keep up the great work!
Thanks for the love, I'm excited too! I hope it turns out how I have visioned it.
I wish I would've sprayed my dash while I had the glass and seats all out of it. It's gonna be a pain in the arse to do it while assembled.
Lookin good.
Yeah, I believe that there is no way to cover the vent area of the dash with the dye while the front window is intact. And I don't plan on pulling the dash out until next winter so that is why it was so important to spray it in the few days that had time to.
Maple Syrup
Canadian Bacon Breath
Re: Sy #2875 Build :eh:
Got some more done in the last few days.
Worked on the outside of the tailgate, body work got finished up. now just needs to be finished being blocked out, wet sanded ect.

Fixed cladding, and by this I mean a whole lot of it. I forgot how much I hate doing this, however its very important. A few pics of the one brutal front arch.


Got the cladding prepped, set the drivers side cladding up on stands and ready for paint. The rest is just awaiting until I find more time!


Prepped and hung the doors, Paint time!

Blocked out the hood, was worse than I expected, Again, GM's factory flaws when pressing the hood skin to the hood frame, wrinkled the hood completely!

Flipped it over, ground down some surface rust and primed the spots.


Flipped it back over and did some body work. Then it was time for primer.

Got home and got a few presents from Milodon:
- LS Oil Pan
- Windage Tray
- Pick Up
- Dip Stick
- Oil Filter Kit
and I got my 4l80E crossmember.


More soon!
Got some more done in the last few days.
Worked on the outside of the tailgate, body work got finished up. now just needs to be finished being blocked out, wet sanded ect.
Fixed cladding, and by this I mean a whole lot of it. I forgot how much I hate doing this, however its very important. A few pics of the one brutal front arch.
Got the cladding prepped, set the drivers side cladding up on stands and ready for paint. The rest is just awaiting until I find more time!
Prepped and hung the doors, Paint time!
Blocked out the hood, was worse than I expected, Again, GM's factory flaws when pressing the hood skin to the hood frame, wrinkled the hood completely!
Flipped it over, ground down some surface rust and primed the spots.
Flipped it back over and did some body work. Then it was time for primer.
Got home and got a few presents from Milodon:
- LS Oil Pan
- Windage Tray
- Pick Up
- Dip Stick
- Oil Filter Kit
and I got my 4l80E crossmember.
More soon!
Last edited:
Maple Syrup
Canadian Bacon Breath
Re: Sy #2875 Build :eh:
Thank you!
I feel like it's not happening quick enough! still very very far away from my goal, But thanks!
From what research that i've done, this pan will clear the diff without modifying, There quality and the fitment (clearence around the diff) were the main reasons for going this with this pan.
However, i'll find out if my research was correct in a few weeks, after test fitting.
You are doing an awesome job . Great pics .
I bet you wrap a mean christmas present too .lol
Thank you!
Outstanding work and so fast!! subscribing to this thread.
I feel like it's not happening quick enough! still very very far away from my goal, But thanks!
are you going to have to mod the oil pan to fit around the diff?
From what research that i've done, this pan will clear the diff without modifying, There quality and the fitment (clearence around the diff) were the main reasons for going this with this pan.
However, i'll find out if my research was correct in a few weeks, after test fitting.
Re: Sy #2875 Build :eh:
what part number? 30915?

curious to see this pan.
From what research that i've done, this pan will clear the diff without modifying, There quality and the fitment (clearence around the diff) were the main reasons for going this with this pan.
However, i'll find out if my research was correct in a few weeks, after test fitting.
what part number? 30915?
curious to see this pan.
Maple Syrup
Canadian Bacon Breath
Re: Sy #2875 Build :eh:
#31083, ill take a picture of it tomorrow.
what part number? 30915?
curious to see this pan.
#31083, ill take a picture of it tomorrow.
Maple Syrup
Canadian Bacon Breath
Re: Sy #2875 Build :eh:
So I started blocking the hood out, seems to be straight enough for now, I may be going a different route than the typical cowl hood or stock hood later on down the road. It isn't perfect but will do the job.

My new computer from a 2000 silverado came in today! After some research, I discovered the factory 98' Z28 camaro computer wouldnt work for this build, I needed a 2000+ computer from a silverado, sierra, savanna ect.
Also got my bible today

Got my bolts/ brackets ect back from the sand blaster today to! Yes all of them are labeled and in individual bags.

Epoxy and paint ect, So I can spray my frame this weekend!

Balljoints & Polly control arm bushings so I can start assembleing the frame and suspension this weekend if time allows.


Yeah the price wasn't too bad. After seeing the pan in person it was worth every penny.
I'll let you know how it fits as soon as we test it! for now, here's a few pictures as promised.


So I started blocking the hood out, seems to be straight enough for now, I may be going a different route than the typical cowl hood or stock hood later on down the road. It isn't perfect but will do the job.
My new computer from a 2000 silverado came in today! After some research, I discovered the factory 98' Z28 camaro computer wouldnt work for this build, I needed a 2000+ computer from a silverado, sierra, savanna ect.
Also got my bible today
Got my bolts/ brackets ect back from the sand blaster today to! Yes all of them are labeled and in individual bags.
Epoxy and paint ect, So I can spray my frame this weekend!
Balljoints & Polly control arm bushings so I can start assembleing the frame and suspension this weekend if time allows.
sweet...not too overly priced either. i have a a minor need for this....hurry up and make sure it works so i can order one. :lol:

Yeah the price wasn't too bad. After seeing the pan in person it was worth every penny.
I'll let you know how it fits as soon as we test it! for now, here's a few pictures as promised.
blacktyaffair
Donating Member
Re: Sy #2875 Build :eh:
Quality work! What epoxy did you use for cladding repair?
Quality work! What epoxy did you use for cladding repair?
Quickstop [UK]
Combating adversyty.
Re: Sy #2875 Build :eh:
Nevermind the actual work on the truck, taking, uploading and then writing about all the great pics is also much appreciated!
Keep up the great work - you're making amazing progress.
Very impressed.
Nevermind the actual work on the truck, taking, uploading and then writing about all the great pics is also much appreciated!
Keep up the great work - you're making amazing progress.
Very impressed.
Maple Syrup
Canadian Bacon Breath
Re: Sy #2875 Build :eh:
Thanks for the love, very much appreciated.
Cant remember the brand name however I have been using it for years. It's called Chem-Weld EP and ill find out the brand name tomorrow.
Small Update.
Didn't accomplish as much as I thought I would however I spent time where it counted and the end product was very pleasing.
So I made some hangers to hang the frame off of the hoist, this was I could spray all angles and cover every part of the frame as opposed to having it sit low to the ground and on jackstands. I still needed to grind down some of the remaining metal from the brackets and crossmembers we removed so that was first.


Im not a fan at all of bondo's and fillers. however it is very helpfull at times. Im especailly not a fan of using it in a frame for example....:roll: however after grinding I wanted to rid any imperfections. So a skim was used and sanded.

Sanded, barely there! (makes me feel better)

After a cleaning, degreasing the frame and blowing it off to remove any last sand and dirt from blasting I was ready to spray!


Epoxy...
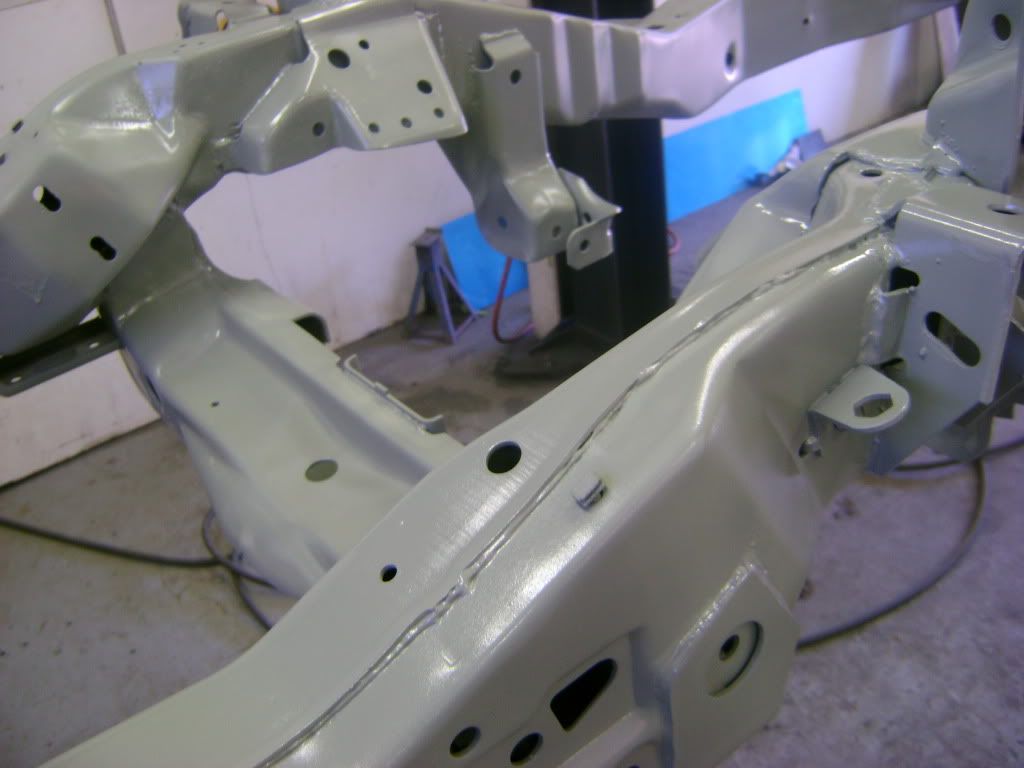

Let the epoxy flash for about 40 minutes, then it was time for the satin :lol:


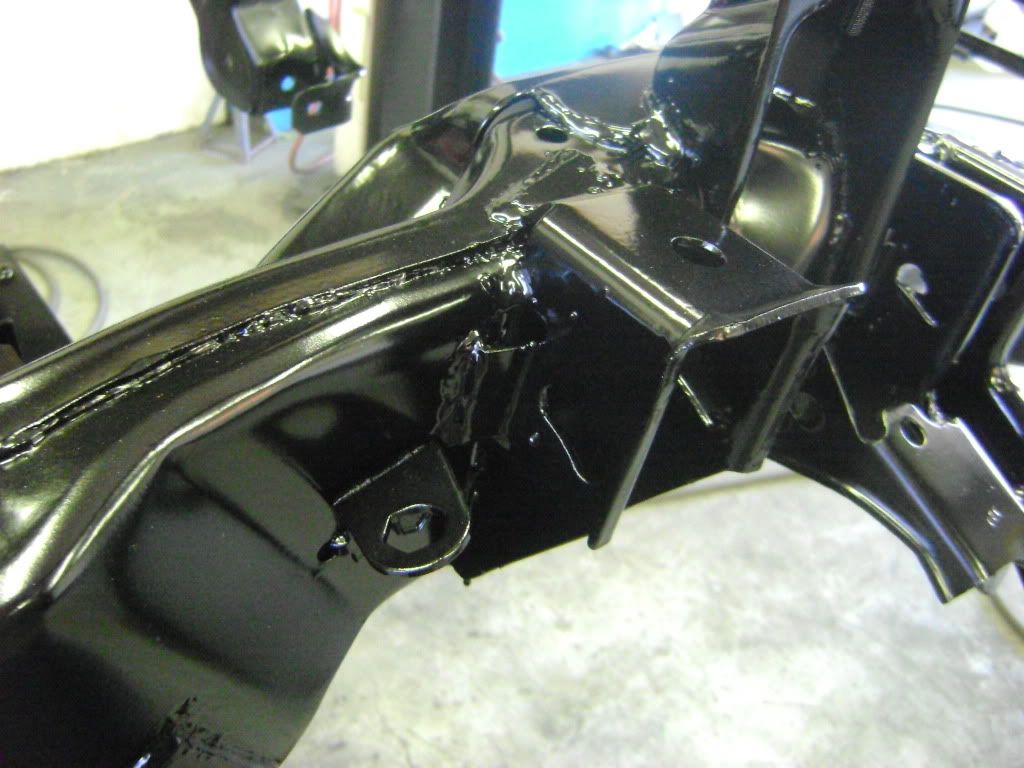
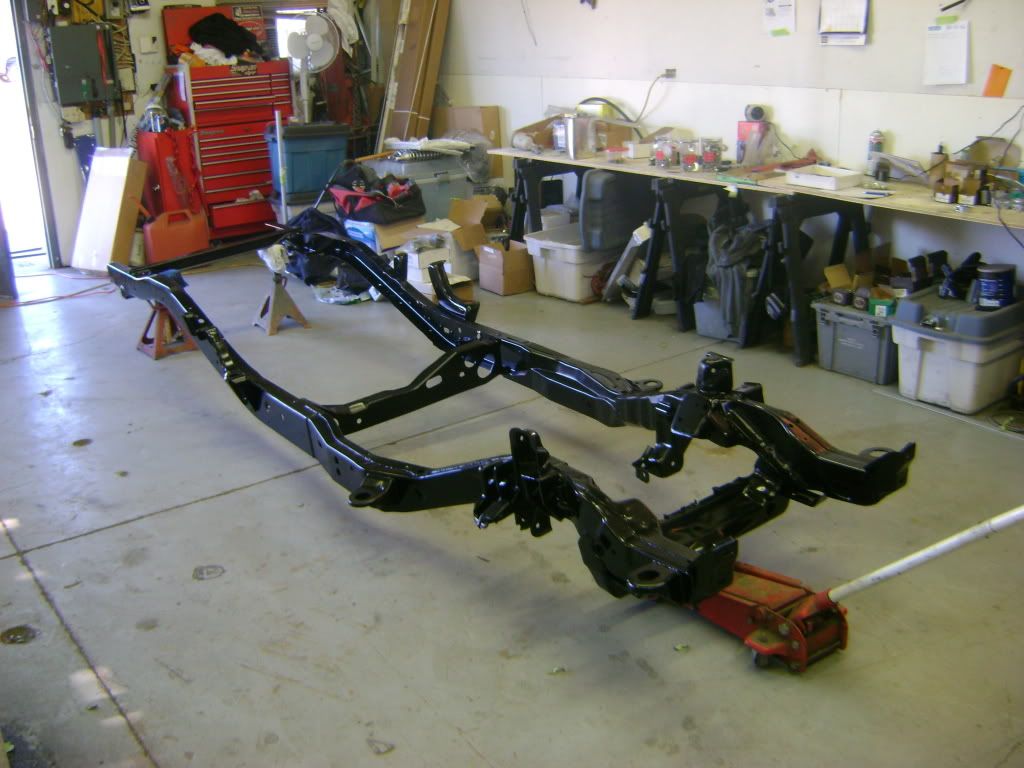
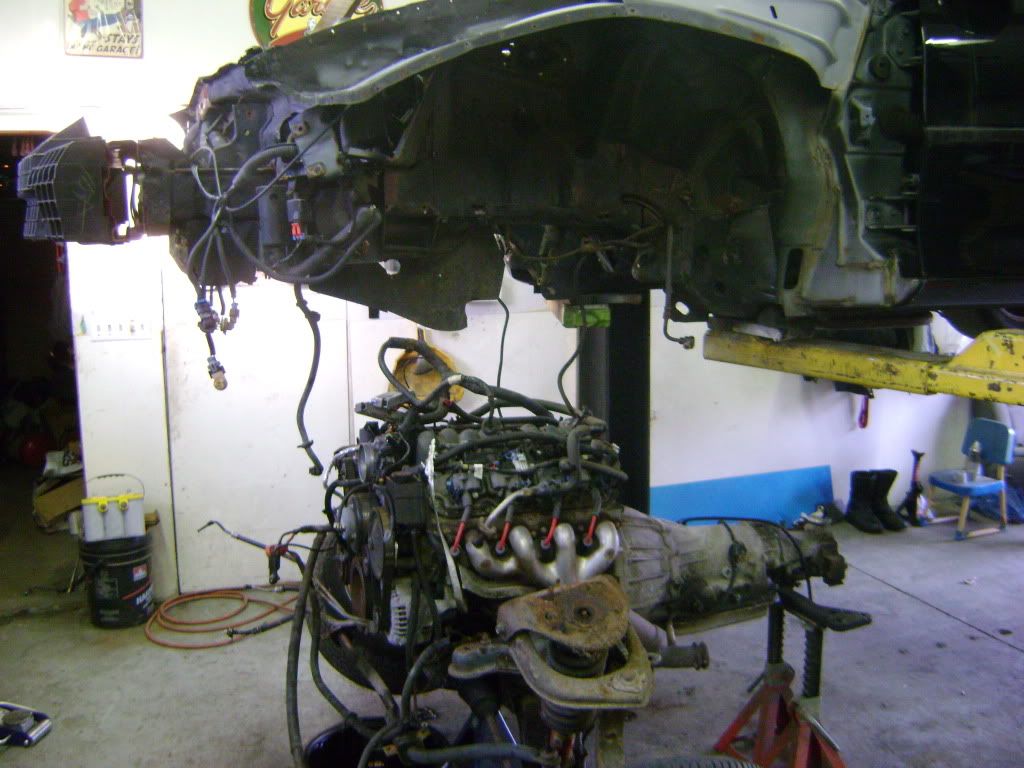
Let it dry for a few hours, then carefully moved it the the other side and brought in the camaro to start pulling to motor!
End of the day, the motor is about 6 bolts from coming out and a little bit of wiring!

Nevermind the actual work on the truck, taking, uploading and then writing about all the great pics is also much appreciated!
Keep up the great work - you're making amazing progress.
Very impressed.
Thanks for the love, very much appreciated.
Quality work! What epoxy did you use for cladding repair?
Cant remember the brand name however I have been using it for years. It's called Chem-Weld EP and ill find out the brand name tomorrow.
Small Update.
Didn't accomplish as much as I thought I would however I spent time where it counted and the end product was very pleasing.
So I made some hangers to hang the frame off of the hoist, this was I could spray all angles and cover every part of the frame as opposed to having it sit low to the ground and on jackstands. I still needed to grind down some of the remaining metal from the brackets and crossmembers we removed so that was first.
Im not a fan at all of bondo's and fillers. however it is very helpfull at times. Im especailly not a fan of using it in a frame for example....:roll: however after grinding I wanted to rid any imperfections. So a skim was used and sanded.
Sanded, barely there! (makes me feel better)
After a cleaning, degreasing the frame and blowing it off to remove any last sand and dirt from blasting I was ready to spray!
Epoxy...
Let the epoxy flash for about 40 minutes, then it was time for the satin :lol:
Let it dry for a few hours, then carefully moved it the the other side and brought in the camaro to start pulling to motor!
End of the day, the motor is about 6 bolts from coming out and a little bit of wiring!
Last edited:
Maple Syrup
Canadian Bacon Breath
Re: Sy #2875 Build :eh:
So its been about another 3 weeks since ive updated! things have been busy as always and my time on the computer has been limited! Anyways enough blabing...
Im starting to get pretty excited now! The pile of parts that make up my Syclone are finally starting to take shape! Where I left off...
Finished pulling the LS1...


Got my long awaited package of goodies from Texas Speed & Performance! :lol:
Included was:
- Torquer V2 Camshaft: 232/234 .595/.598 112 LSA
- Dual Valve Spring Kit: PRC .675"
- .7400" Pushrods
- LS2 Timing Chain
- LS7 Lifters

Spent a few nights after work finishing off the box and taping if up for paint


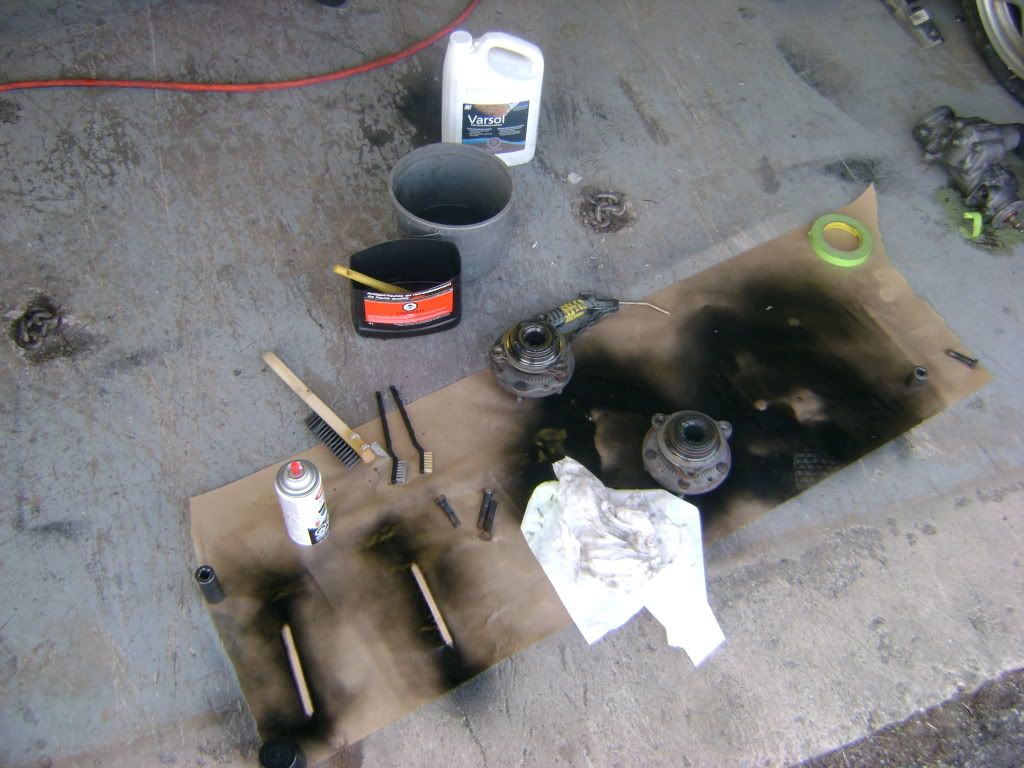
Started painting alottt, and i mean alot of suspension and drivetrain parts, brackets and bolts! this was my cleaning and painting station for the little pieces
letting some brackets dry....

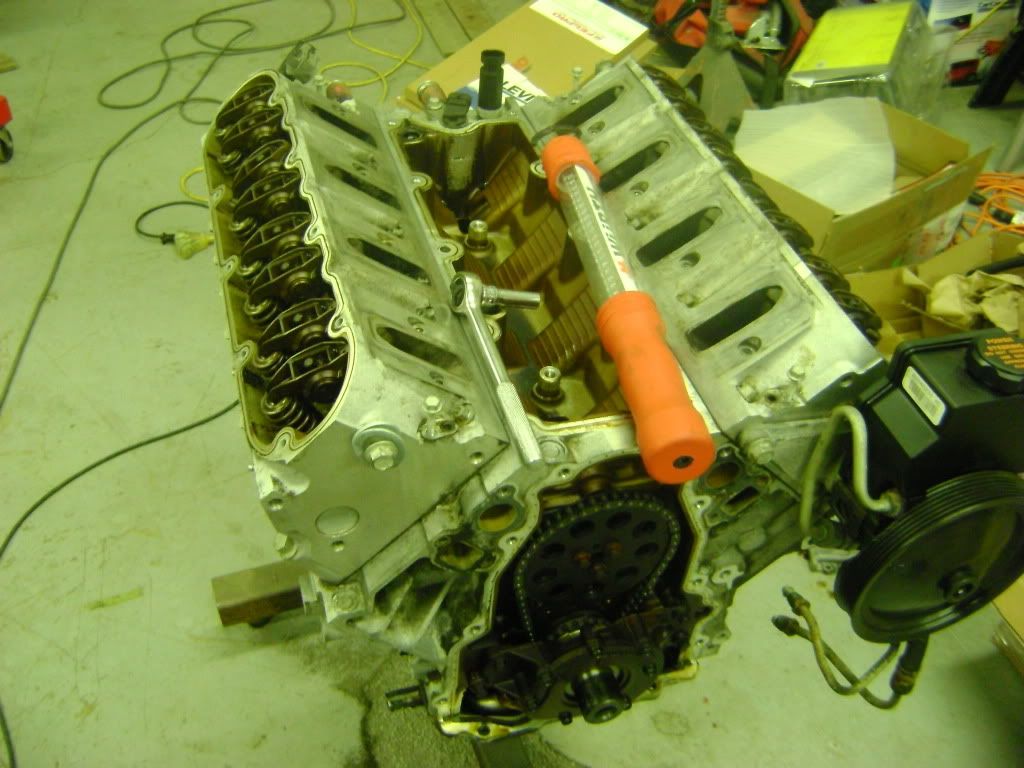
Stripped the manifolds and harness and removed the 4L60E off the LS1, Engine shampoo'd the LS1 and let it soak overnight.
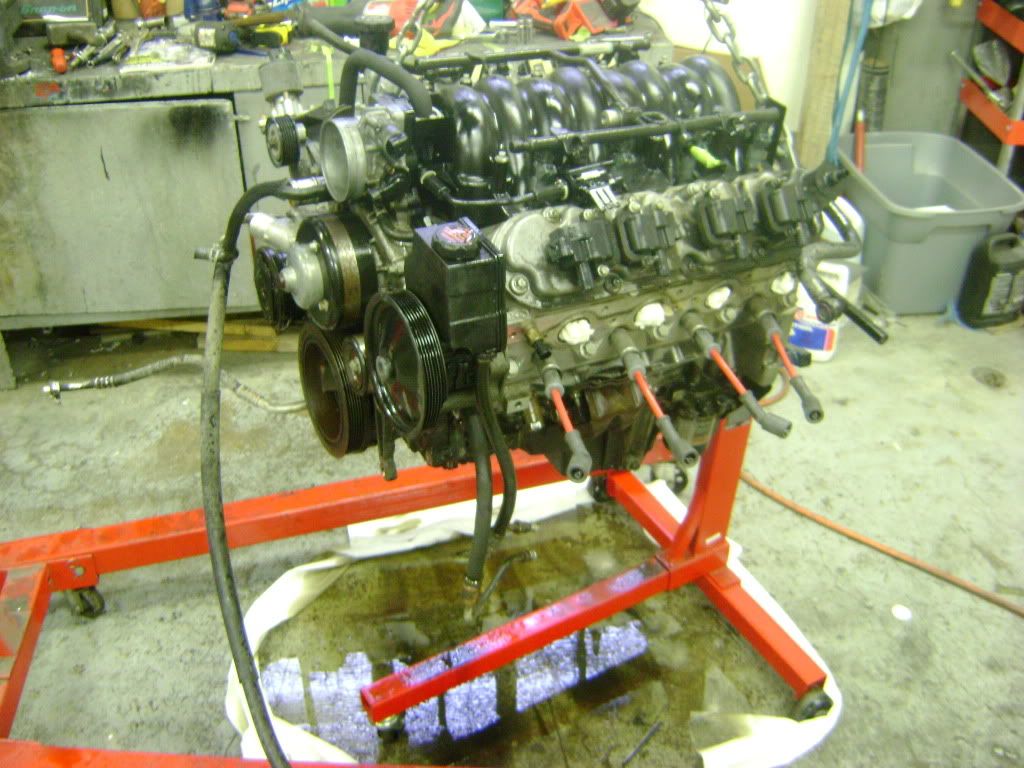
Cleaned it and then soaked it in acid for a few minutes then pressure washed this off aswell.

I had planned on painting the block, heads ect ect black, however after cleaning and pressure washing it ive decided to leave the block and heads as is
Painted some more parts...
started putting some of the pieces back together....

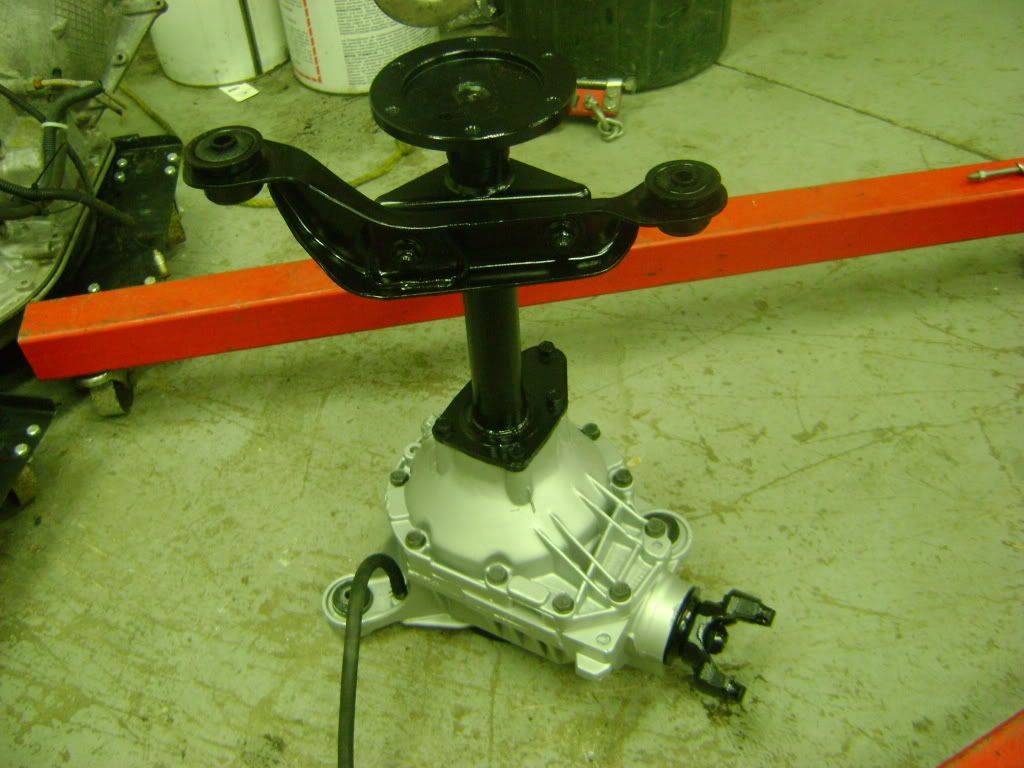
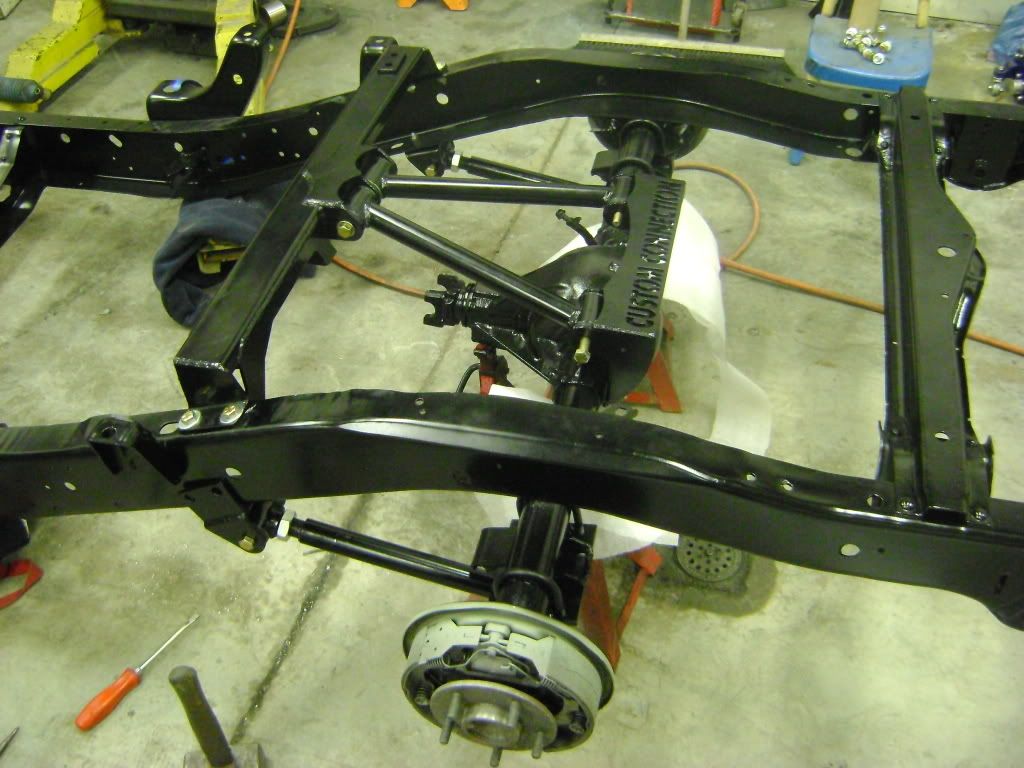
Installed my Sportmachines tubular Arms and ran into a problem...The bracket by the left upper control arm mounting point was "useless" as far as my father and I could see, So off it went! Maybe someone can chime in and let me know the purpose of it however it wouldnt allow the front suspension to work as planned so its gone.

First Fitment with the new Arms, Coilovers, and Balljoints.
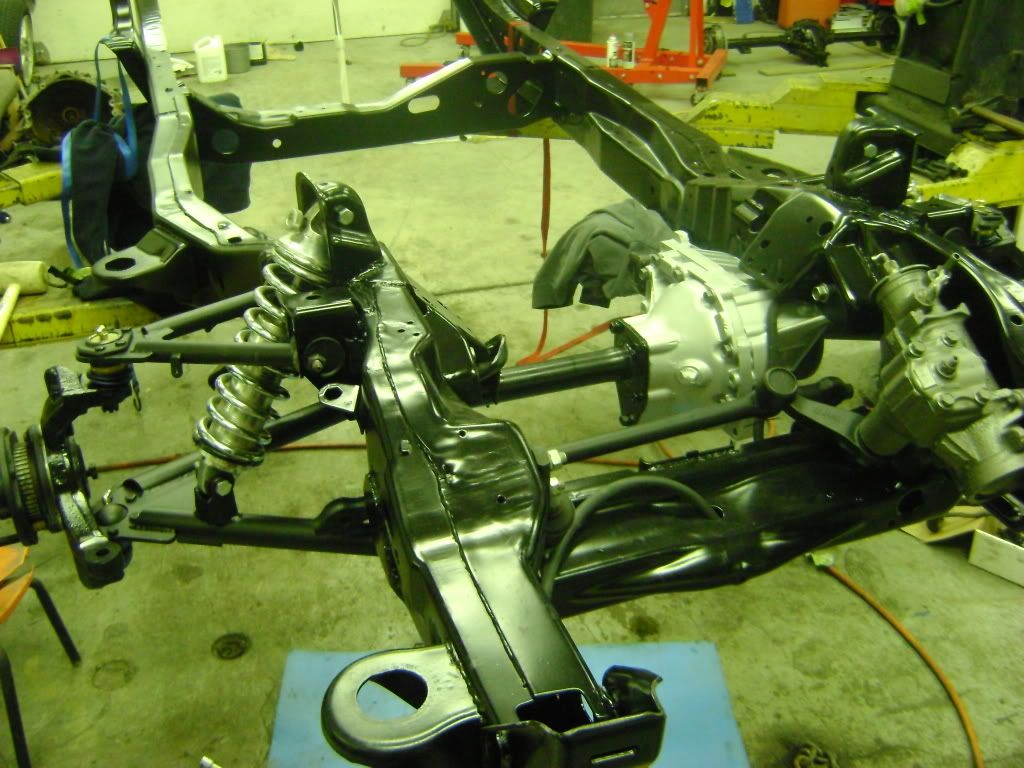
Got my dad to hold the driveshaft in place (not mounted up) to get an idea of clearence...


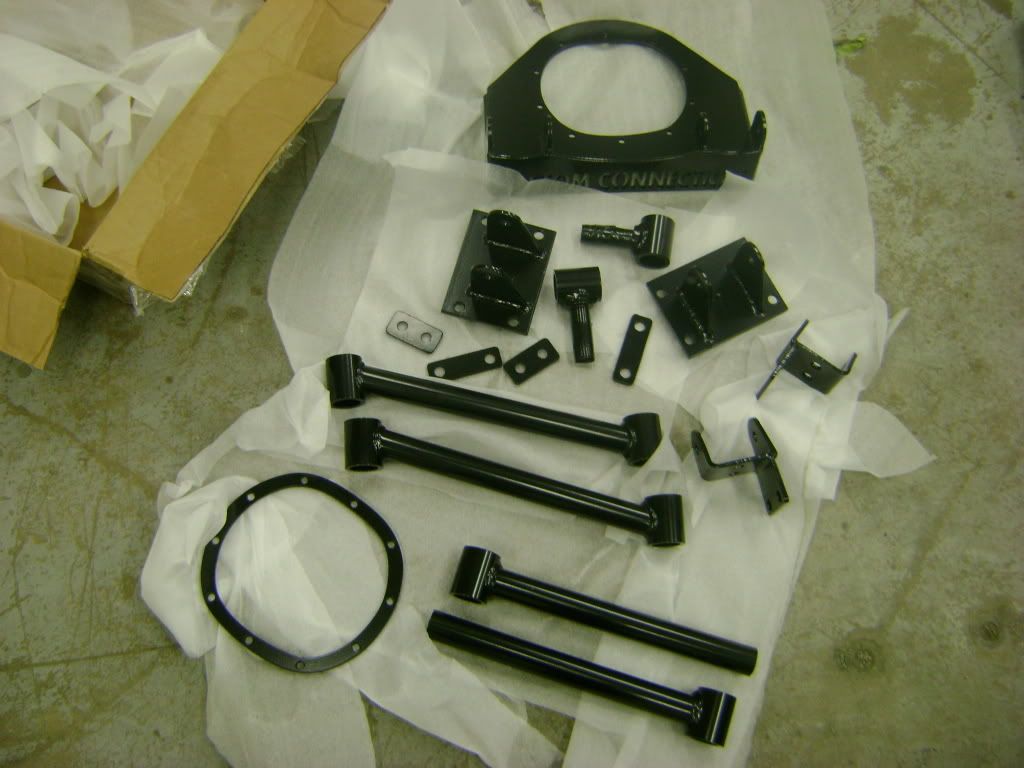
Some more time went by....:roll: and my 4-Link finally came in
Decided to go with the KP Components bolt on 4-Link

test fitted the Main Crossmember which is a factory ish replacement for the ugly heavy crossmemeber that hold the gas tank. This crossmemeber actually raises the gastank up 2" higher as well.


Pack it all back up after and sent it off for sandblasting and powdercoating
Started working on my fenders since they were back from getting any little surface rust under the cladding bead blasted off. Finished the body work for the shaved antenna and spot primed it for now.

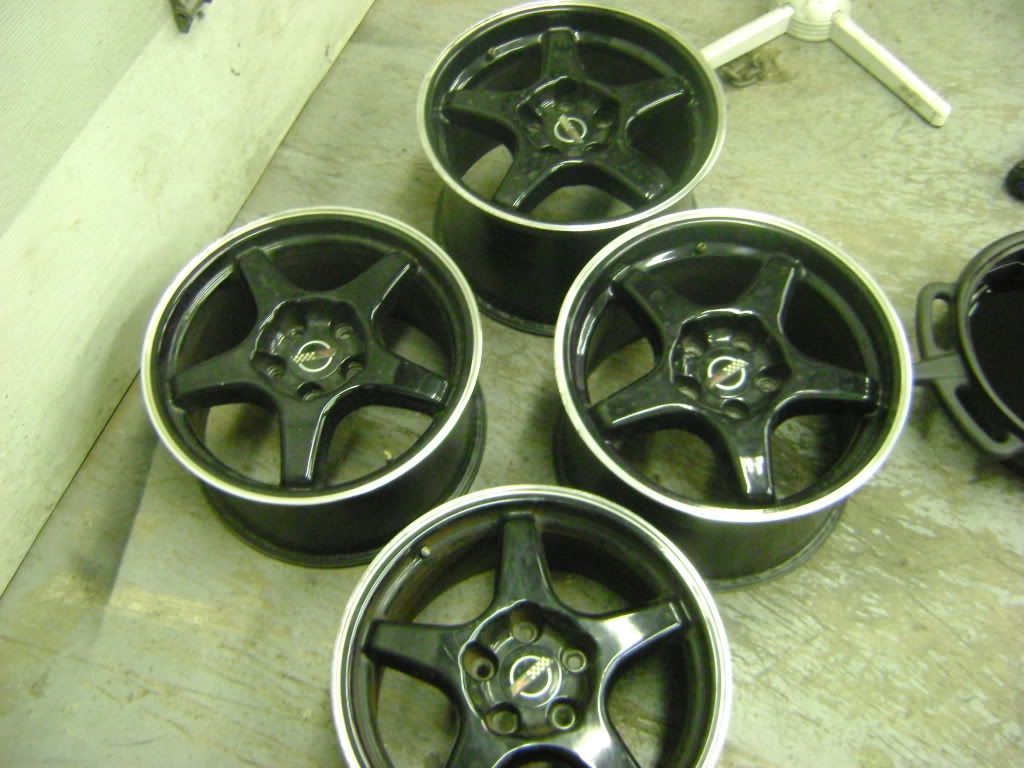
Also picked up these (imo very played out) C4 vette reps which will be alot better than stock! 9.5 Fronts & 11 Rears
Got my 4-Link stuff back from the powdercoater and started mounting it up for good


Then came the crossmember we had to make to mount the frame to hold the coilovers from here to the rear end.


Cut, fitted, welded and clipped in place....

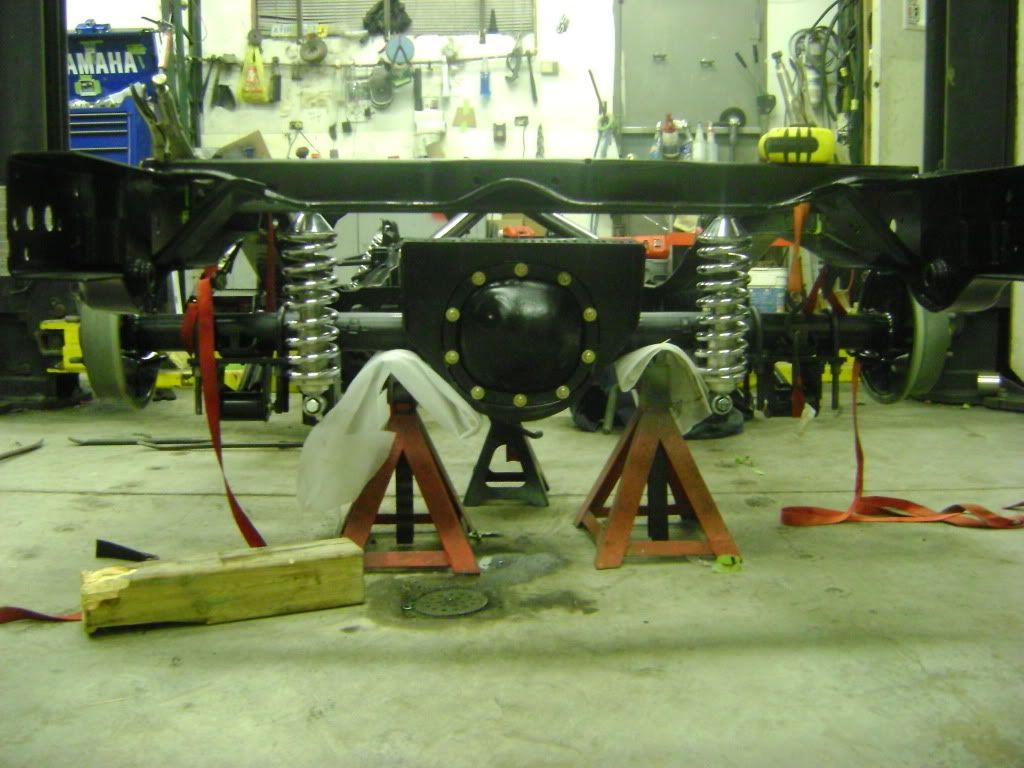
After these photos we started to think more and more, ultimately this crossmember may be scrapped as the Coilover position may be moved, Mounting them on a angle and closer to the frame will provide us with a lot more room for the 3' exhaust in the future...Nothing is set in stone yet, but im not thrilled with this setup so it will most likely change.
After my head wanting to explode from measuring and thinking of the rear end, I decided to take a break and start tearing down the LS1 for the Cam install ect and this is where I stopped.
This is all I have for now!
Stay tuned!
So its been about another 3 weeks since ive updated! things have been busy as always and my time on the computer has been limited! Anyways enough blabing...
Im starting to get pretty excited now! The pile of parts that make up my Syclone are finally starting to take shape! Where I left off...
Finished pulling the LS1...
Got my long awaited package of goodies from Texas Speed & Performance! :lol:
Included was:
- Torquer V2 Camshaft: 232/234 .595/.598 112 LSA
- Dual Valve Spring Kit: PRC .675"
- .7400" Pushrods
- LS2 Timing Chain
- LS7 Lifters
Spent a few nights after work finishing off the box and taping if up for paint
Started painting alottt, and i mean alot of suspension and drivetrain parts, brackets and bolts! this was my cleaning and painting station for the little pieces
letting some brackets dry....
Stripped the manifolds and harness and removed the 4L60E off the LS1, Engine shampoo'd the LS1 and let it soak overnight.
Cleaned it and then soaked it in acid for a few minutes then pressure washed this off aswell.
I had planned on painting the block, heads ect ect black, however after cleaning and pressure washing it ive decided to leave the block and heads as is
Painted some more parts...
started putting some of the pieces back together....
Installed my Sportmachines tubular Arms and ran into a problem...The bracket by the left upper control arm mounting point was "useless" as far as my father and I could see, So off it went! Maybe someone can chime in and let me know the purpose of it however it wouldnt allow the front suspension to work as planned so its gone.
First Fitment with the new Arms, Coilovers, and Balljoints.
Got my dad to hold the driveshaft in place (not mounted up) to get an idea of clearence...
Some more time went by....:roll: and my 4-Link finally came in
Decided to go with the KP Components bolt on 4-Link
test fitted the Main Crossmember which is a factory ish replacement for the ugly heavy crossmemeber that hold the gas tank. This crossmemeber actually raises the gastank up 2" higher as well.
Pack it all back up after and sent it off for sandblasting and powdercoating
Started working on my fenders since they were back from getting any little surface rust under the cladding bead blasted off. Finished the body work for the shaved antenna and spot primed it for now.
Also picked up these (imo very played out) C4 vette reps which will be alot better than stock! 9.5 Fronts & 11 Rears
Got my 4-Link stuff back from the powdercoater and started mounting it up for good
Then came the crossmember we had to make to mount the frame to hold the coilovers from here to the rear end.
Cut, fitted, welded and clipped in place....
After these photos we started to think more and more, ultimately this crossmember may be scrapped as the Coilover position may be moved, Mounting them on a angle and closer to the frame will provide us with a lot more room for the 3' exhaust in the future...Nothing is set in stone yet, but im not thrilled with this setup so it will most likely change.
After my head wanting to explode from measuring and thinking of the rear end, I decided to take a break and start tearing down the LS1 for the Cam install ect and this is where I stopped.
This is all I have for now!
Stay tuned!
Black Knight
I Glow Therefore I am
Re: Sy #2875 Build :eh:
Very cool, keep it up!
Very cool, keep it up!
DanenGraham
Big in the rear
Re: Sy #2875 Build :eh:
Everything looks amazing, great build. Keep it up
Everything looks amazing, great build. Keep it up