Full frame off resto

Terry

Member
Hey All,

Been few weeks, was oncall one of the weekends, ended up really tired and so another weekend so didn't feel like any garage time.

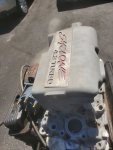
This Friday I took off work so I could get my motor in for disassemble and full rebuild.

We took the motor off the stand and had to get out the engine hoist to help. Did get the short block into the truck bed.

Took over to a shop 10 min away. Guy builds truck pull motors and has for very long time. He comes highly recommended. Him and his partner lifted out the motor and that was that. I have to email him what I want done.

I'm thinking set of eagle H-beam rods
(Cause this all I can find)
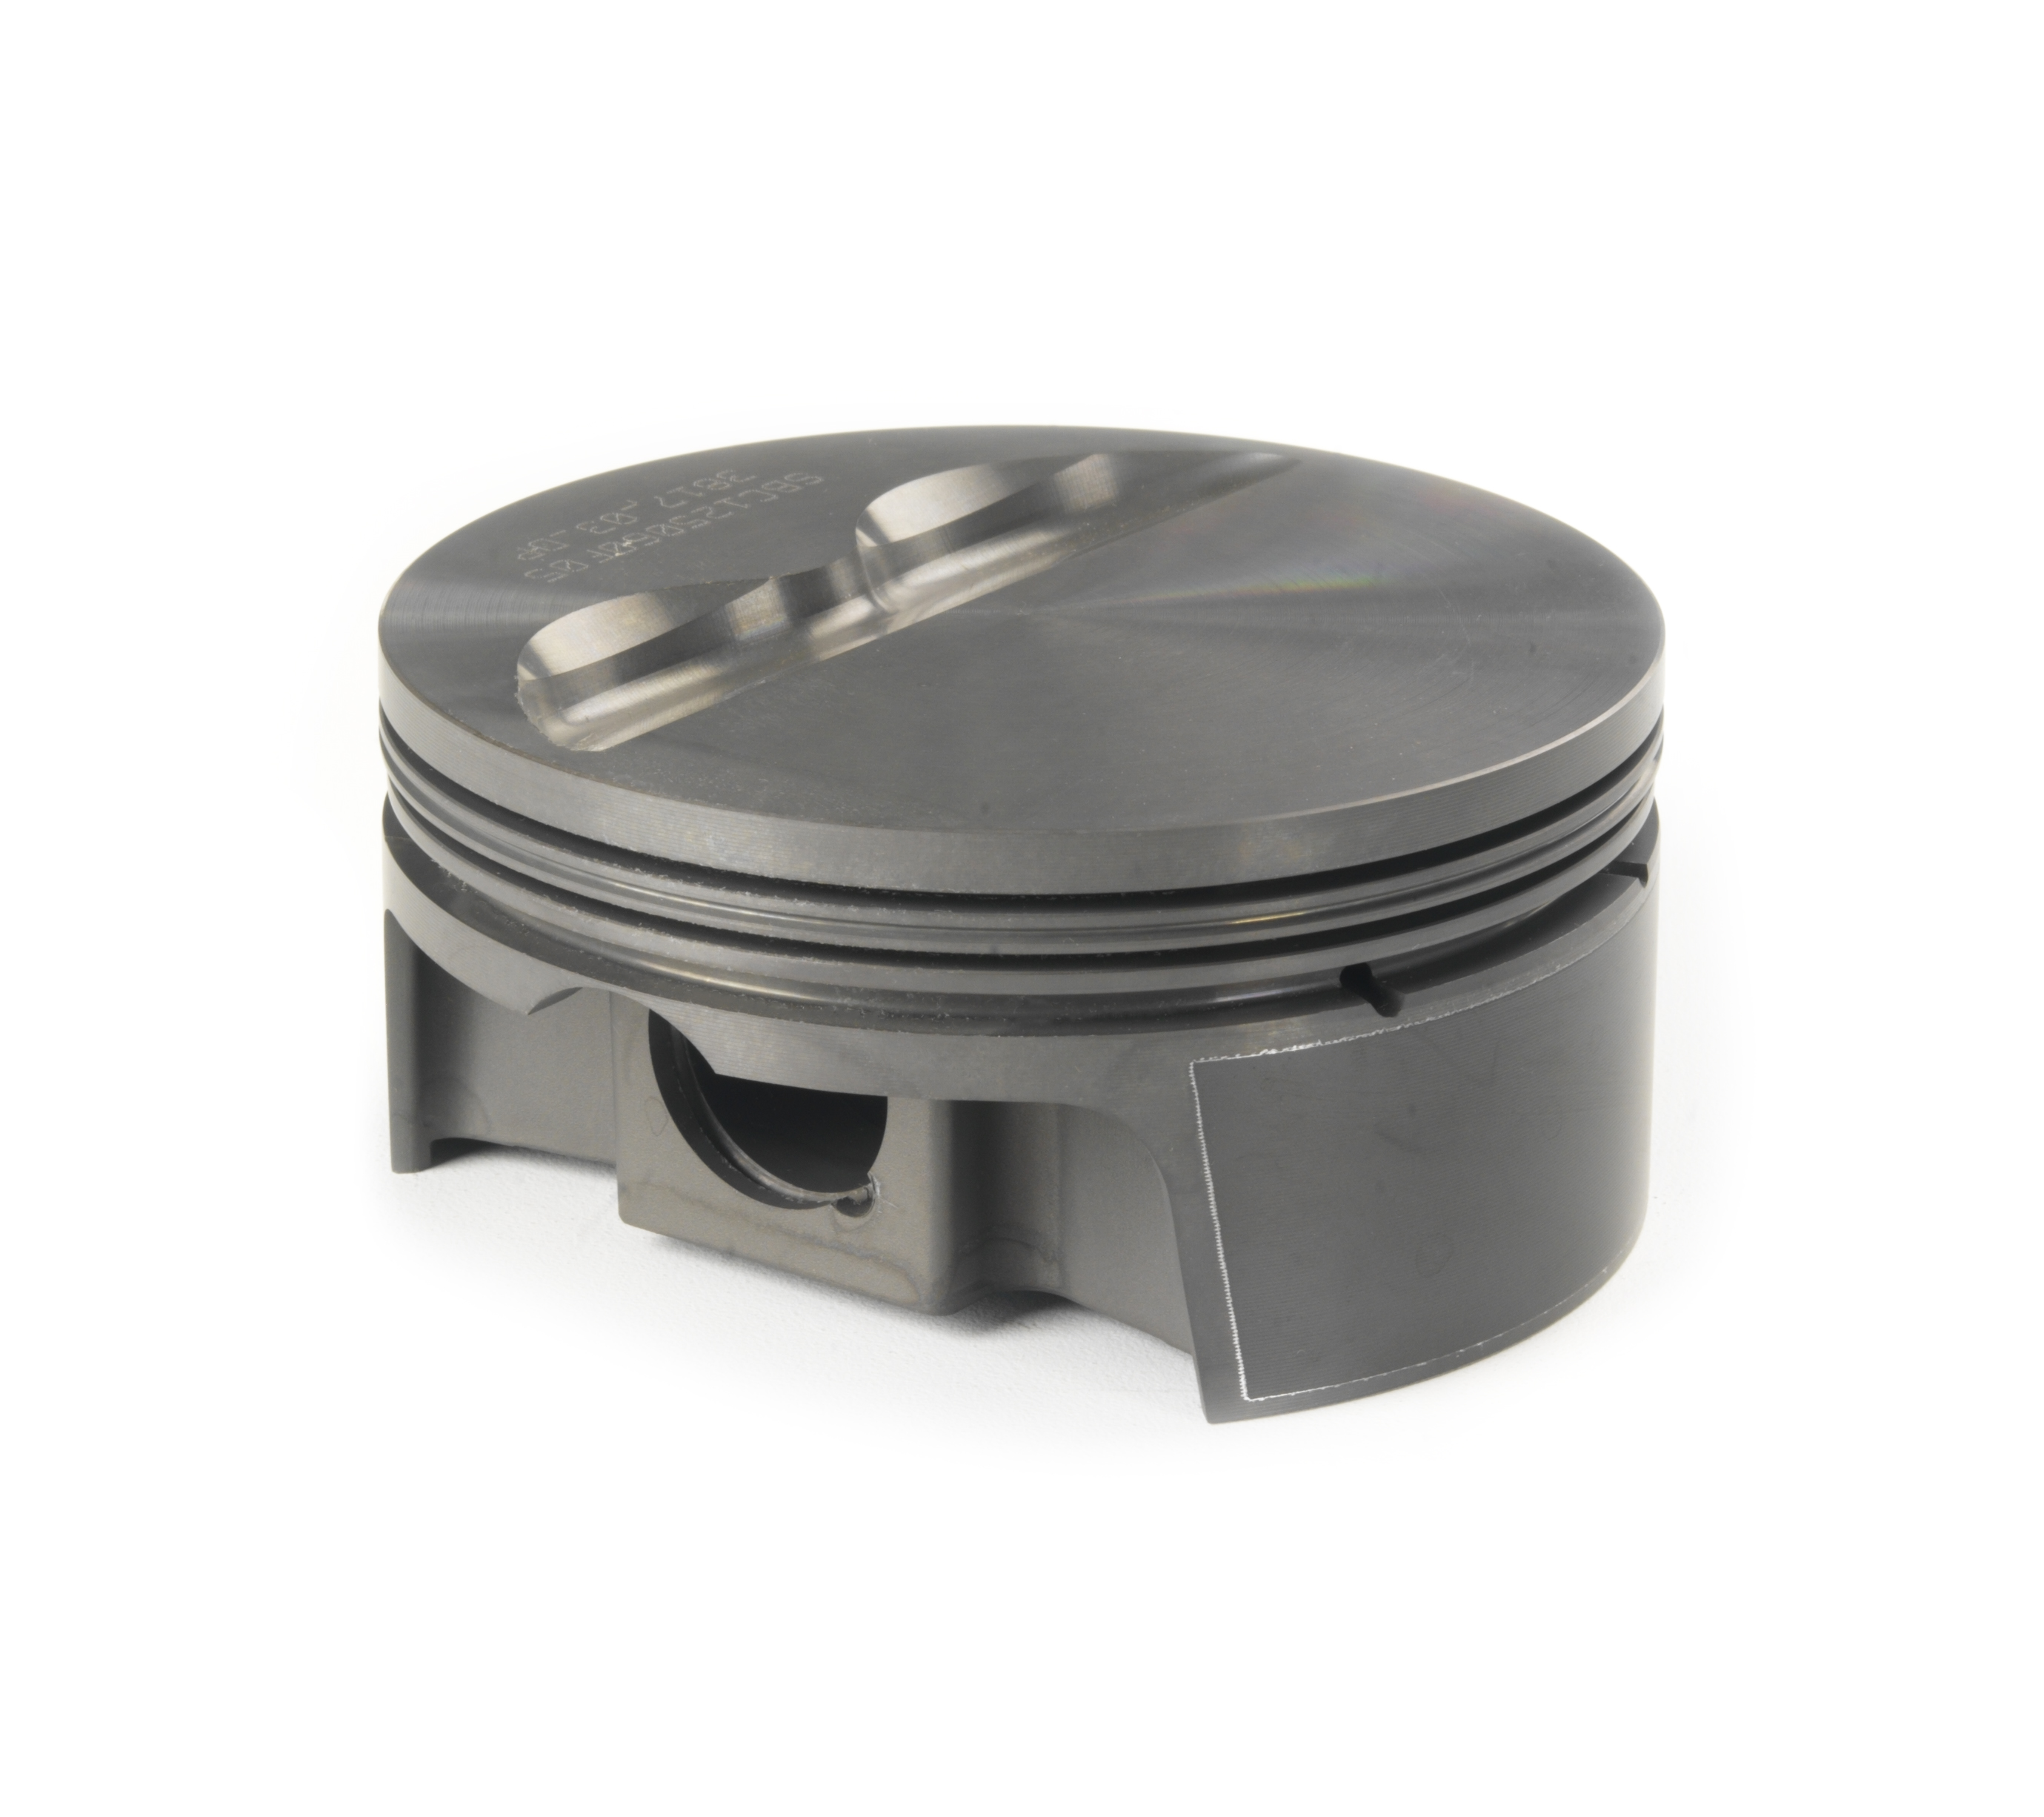
Forged pistons. Hopefully US made.
Depending on cost - 4 bolt main caps on middle 2
Valve job with new rockers, valves etc.
I will have them assemble the short block and I can put the rest on from their.

I did contact sportmachines in NY. Glad they still open. Tom said to send him a list of required stuff and he get me pricing.

I will also put in a new cam. Probably same as the original specs.

If anyone has some suggestions/recommendations for engine internals, let me know.

Next weekend (and it's a long weekend in Ontario! May 24) is the floor pan replacement. It's time to start that repair. Better order the white por-15

Talk soon
 

Attachments

  • 20210514_124330.jpg
    20210514_124330.jpg
    1.7 MB · Views: 25
  • 20210514_125827.jpg
    20210514_125827.jpg
    2 MB · Views: 28
  • 20210514_125831.jpg
    20210514_125831.jpg
    1.7 MB · Views: 27
  • 20210514_132220.jpg
    20210514_132220.jpg
    1.6 MB · Views: 28

Terry

Member
Been a few weeks since an update. Just been so busy. I have been working on the truck.

May 22/21

Had to change around the front rotisserie mounting location so I could begin changing the diver side footwell and body mount.

Quickly fabbed up a small bracket by drilling some holes and attached the left side Rotis mount to a front fender/clip mount. The body isn't really that heavy and once changed, seemed sturdy.

It seems as if the replacement cab floor supports were intended to be hammered overtop of the existing ones so without further adu, we cleaned off as much crap of the rusty cab mount with a course wire wheel. I did have to trim a few little spots but the new cab mount fit decent.

I was.running outa steam.for the day so I had dad coat the whole area with por-15 inside and out, I hammered the mount into place and secured with another home made bracket. I put a couple of tacks welds on but I was done for the day. Quick clean up and see ya next weekend Dad!
.
 

Attachments

  • 20210522_111405.jpg
    20210522_111405.jpg
    1.5 MB · Views: 20
  • 20210522_132503.jpg
    20210522_132503.jpg
    1.2 MB · Views: 21
  • 20210522_132507.jpg
    20210522_132507.jpg
    1,009.9 KB · Views: 21

Terry

Member
May 29/21

Hey,.

Was such a beautiful weekend, rolled the truck out to work in the sunshine!
.
The driver and passenger side (forgot to mention this last week) in the cab mount areas are actually 3 layers. From the bottom up, cab mount, reinforcement plate/bracket then floor pan. I didn't want to cut any of the reinforcement away and don't have a spot weld cutter so I ground away the welds, separating the floor at that point.

All that held the seam from the "side meets floor" was seam sealer so that was scraped out. I cut out the least amount of floor pan I could keeping as much original metal as possible, as well as getting all the rot.

I did cut the new replacement panel out to fit the trucks floor but wanted to por-15 all over this portion as well.

One of the drainage holes under the passenger side rear seat was also rusted out. I cut out a square and attempted to patch this but the old man's welder couldn't be turned down enough and was blowing holes.

I'm bringing over my new miller next weekend to weld both these in. It's turns right down when needed.

Till next time.
 

Attachments

  • 20210529_140720.jpg
    20210529_140720.jpg
    1.5 MB · Views: 22
  • 20210529_140724.jpg
    20210529_140724.jpg
    1.6 MB · Views: 22
  • 20210529_145237.jpg
    20210529_145237.jpg
    1.1 MB · Views: 22

Terry

Member
Again, few more. This is under the back seat. I cut out the rotten section and attempted to weld the new panel but the welder jut too hot. Even the manual indicates not recommended for this thin.

needless to say, not happy with this patch so far. Will probably cut out and do another. A better fit and a better machine. Glad it happened on this one the the footwell area.
 

Attachments

  • 20210529_151849.jpg
    20210529_151849.jpg
    1.7 MB · Views: 23
  • 20210529_155033.jpg
    20210529_155033.jpg
    1.9 MB · Views: 23

Terry

Member
I know its really hard to see, the first picture has the hole. What looks like the floor is actually the driveway. Second picture has the shitty patch
 

Goodgollyjosh

Active member
Looking good Terry. Loving all the fabrication work. It's gonna be one clean Ty when you're done with her. I'm constantly stripping stock stuff off my Sy. Let me know if there's anything you're looking for and I'll keep an eye out.
 

Terry

Member
If there is anything I'm having a hard time finding, it's good know there's lads willing to help. Thanks man.

Do have a question,

Anyone play with compression ratio?
I believe the factory CR is 8.35 to 1. Since im changing the rod and pistons anyways I've been thinking about upping the CR to 8.5. It's only a little bit so everything should be ok. Or is this not recommended? I figure a little bit here and a little.bit there should give me a bit more power without major mods

What do you guys think?
 

DaveP's Ghost

Well-known member
Anyone play with compression ratio?
What do you guys think?

Most cyl head refurbishments include a .020-.030 clean-up surfacing. This alone will give you your desired bump in compression.

I had a 92 Ty that I bought from a salvage yard, so there was no history with it, but I did confirm that the engine was the original born-with engine. This was 1995, who'd a thunk a 3 year old Ty would have had engine work? I fought chronic detonation and boost problems for a couple of years. It ran fine on 100LL Aviation fuel, but that wasn't practical or economical. Eventually I took the engine apart and discovered that the pistons were conventional flat-tops which are about 9.5:1.

Keep in mind that when these engines were developed and validated, the recommended Premium fuels at the time were 97 Octane. In my area Premium is now 91 Octane. You can't get the fuel for even the stock compression and boost levels any more. I see this simple fact ignored on forum after forum in discussion after discussion. Modern engines get the power levels they do from evolutionary features such as combustion chamber design, induction system design, variable valve timing, and a myriad of other improvements over the 30+ year old dinosaur technology of a SyTy.

EDITED 6/15, strikeout and italicized text added.
 
Last edited:

Goodgollyjosh

Active member
"Keep in mind that when these engines were developed and validated, the recommended Premium fuels were 97 Octane"

I didn't realize they did it with 97, good info to know.
 

Terry

Member
Hey guys,

I didn't know the recommendation was for 97 octane fuel either. I've always used sunoco 94 up here as that's the best available in Ontario. (It is currently available as is 93)

Yes I will be having the heads done and if that brings CR up to 8.5 to 1 then I'm going to leave at that. Certainly don't want to go higher and Certainly don't need the hassle or expense of having to get better fuel then the local gas station carries.

Thanks for the heads up
 

DaveP's Ghost

Well-known member
Let me elaborate. In 1990-1991, Premium fuel at the pump was 97. I presume that that is what was used to validate these engines. Whether it was "recommended" or not, I have no idea. The sticker in the fuel door (applied by PAS) specifies "Premium Fuel Recommended" but there is no octane number. Same with my ZR-1. Premium is recommended. These engines have Ignition Spark Retard if detonation is detected. Perhaps a specific Octane number is irrelevant; the engine is protected.


L88 Fuel Decal.jpg

The engine in the cars with this specific engine did NOT have electronic controls. With 12.5:1 compression, there was a specific Octane requirement, and this decal was installed right on the center console of the 216 cars so equipped to remind the owners of the fuel requirement. Hint: If you don't know what car/engine this is, put your cursor over the image. The answer is in the image's title I gave it to save it for posting.
 
Last edited:

RealFastV6

@jb_and_his_coffee
93 octane is the recommended fuel, with 91 being the minimum required - but the point is still valid. It's hard to even get 93 in some places.

Edit:
Adding references:
(From the PAS Specifications Document)
RECOMMENDED_OCTANE.JPG

(From the SyTy Supplement)

MIN_OCTANE.JPG
 
Last edited:

Terry

Member
Ok, I can't see what car you are referencing.and maybe it cause I'm viewing this from my phone but if I was going to guess - late 60's ZL-1 (I didn't cheat and look this up) I do remember as a kid seeing a sticker like this. Think it was a vette.
 

Terry

Member
Can't believe how fast time files in the summer when you work at a refigeration company!

Been few weeks since an update.

I have almost finnished the trucks floor. I have a single.coat of Por-15 white on the floor but still needs another. There is a bit more welding under the truck. A bit punky infront of the rear wheel well behind the cladding. One one will see this but I know its there. After that I believe all the body work that I'm capable of will be done. Off to fix could of drill holes and paint.

Got a call from the engine ship. Motor all disassembled and inspected.

Block - needs cylinder wall clean up up ok.
Crank - garbage
Rods - garbage
Pistons - garbage

They have found a good crank with low miles, ordered eagle rods. Not sure about pistons
Probably going to pick up the top and bottom intake manifold sections and have powder coated factory gray colour.

About all I can think of at the moment.
 

Attachments

  • 20210710_124320.jpg
    20210710_124320.jpg
    3.2 MB · Views: 15
  • 20210710_124325.jpg
    20210710_124325.jpg
    2.8 MB · Views: 15
  • 20210710_130425.jpg
    20210710_130425.jpg
    1.6 MB · Views: 15

Terry

Member
This is first coat. Buy the time you.guys read this, probably have a second coat of white on the cover the floor.

Not sure if I'm going to do white on the bottom (probably) or black. Either way, bottom will also be por-15ed.

Till next time. T
 

Attachments

  • 20210710_135401.jpg
    20210710_135401.jpg
    2.7 MB · Views: 15
  • 20210710_135416.jpg
    20210710_135416.jpg
    3.1 MB · Views: 17
  • 20210710_135419.jpg
    20210710_135419.jpg
    1.1 MB · Views: 18

Terry

Member
Awsome. I'm at that point now so will need to find out if these are available.

Anyways, taking a bit of time off working on the truck for few weeks ( Dr. Orders)

Got a pic of me sitting In the hospital, just got a cast on my left arm. Fractured my wrist Monday night after cashing my mountain bike. At least it's my left hand and not the dominant.

Oh well. Well see what the doctor says if few weeks. I seem to heal quickly so here's hopping.
 

Attachments

  • 20210727_001436.jpg
    20210727_001436.jpg
    1.4 MB · Views: 11
Top