Quinnster's Syclone 2208 Rebuild

QuinnSY

Donating Member
Re: Quinnster's Syclone 2208 Rebuild

Ok, so it has been a little while since I have updated, but quite a bit has happened as far as getting her put back together goes!

I now have every part necessary (so I think:lol:) to build the engine besides the heads which should come in on monday!

My CP pistons
IMG_1118.jpg

IMG_1120.jpg


Making sure the pistons and rods look sexy as hell put together!
IMG_1122.jpg

IMG_1124.jpg
 

QuinnSY

Donating Member
Re: Quinnster's Syclone 2208 Rebuild

Next I had to go through the long dreaded task of gapping the rings!

This is how I got them. All overlapping
IMG_1177.jpg


I would make a little mark with a sharpie so I would have perception on how much I am actually shaving off rather than just going blind
IMG_1178.jpg


I quickly realized the hand driven turn wheel was slow and stupid so I made my own modification!:D
IMG_1181.jpg


Test fit 100 times by pushing the ring down with the piston ensuring it was level then measuring.
IMG_1176.jpg

IMG_1175.jpg

IMG_1173.jpg


And thats it.... x12:roll:
IMG_1171.jpg
 

QuinnSY

Donating Member
Re: Quinnster's Syclone 2208 Rebuild

Then on Sunday I talked to Dave P to see if he wanted to help me out with building the motor to make sure I do everything right being my first engine build, and he was up for the challenge!

Pulled the crank out and admired it for a bit.
8b3cc2de.jpg


Then set the crank in the block so Dave could check some clearances
2cb1b845.jpg


Every thing looked good so we put on the main caps and torqued them down to the machinist's specs
044c29fd.jpg


70lbs for the two center bolts and 65 for the Splayed's using 50wt oil to torque em.
b2414578.jpg


Then we threw the pistons on the rods along with the rings and put them all in place and torqued them all down
cd807af0.jpg

88a61858.jpg

ec694868.jpg

044c29fd.jpg


Everything seems pretty happy all together, and I will hopefully get my heads back soon along with a new timing chain and thrust button for my cam since they kinda messed up and thought our engines came with a flat tappet cam and it was being converted to a roller so the cam nose was designed wrong!:banghead:
Once all that is situated we will be on our way. :tup:
 
B

biggeolb

Guest
Re: Quinnster's Syclone 2208 Rebuild

Quinnster, how is your build coming along?
 

QuinnSY

Donating Member
Re: Quinnster's Syclone 2208 Rebuild

Quinnster, how is your build coming along?

Got the short block mostly built. I just gotta get the camshaft degreed once I get back in town, then I can keep going till its done. no more waiting on parts, just waiting on my slow ass now:lol: Hopefully early August now!
 

QuinnSY

Donating Member
Re: Quinnster's Syclone 2208 Rebuild

Degreed the Cam, and checked for clearances over with weekend with Dave P. Got the cam adjusted within 1/2 a degree and the piston to valve clearance is more than 500 thousandths at all times. At TDC the valve can open 500 thousandths without hitting the piston. Now I just gotta get the heads finished up and throw em on the block!
IMG_1571.jpg

IMG_1567.jpg

IMG_1566.jpg
 

DaveP

Active member
Re: Quinnster's Syclone 2208 Rebuild

.... and the piston to valve clearance is more than 500 thousandths at all times.

I don't recall it being "more than .500 at all times" but it was at least .350 at least 30º each side of TDC.

I learned something while performing this check. Because of the dished pistons, you get about .250 of clearance right off the bat. Then because turbo cams have fairly wide LSA and late intake vale opening (compared to NA applications), valve-to-piston clearance is a non-issue. At least in this engine it was. Even with 6" rod length which lets the piston dwell longer at TDC.

I feel retainer-to-guide interference / clearance is a bigger issue and needs to be checked on a 'hi perf' build. Especially when the lift exceeds .500.
:2cents:
DaveP
 

QuinnSY

Donating Member
Re: Quinnster's Syclone 2208 Rebuild

Its been a while since I have updated, so I figured I would go ahead and do so now. So here is where I'm at.

I figured while the engine was out I might as well take out the front diff and replace it with a lower mile one or take the chances of having it rebuilt. I ended up deciding to go with a company that does nothing but drive shafts and differential and figured they would properly rebuild it. It turns out they didn't... When Dave came over and looked at it he immediately didn't like the feel of the pre load on the ring and pinion (too tight). Since it has a 2 year warranty I decided against Dave's good judgement to go ahead and put it in, and after fussing with it for a while and installing it I filled it up with diff oil and it immediately started seeping out :roll: So I spent the time and took it back out and sent it back to them and let them know the issues and they currently have it and promise it will be right this time. :)

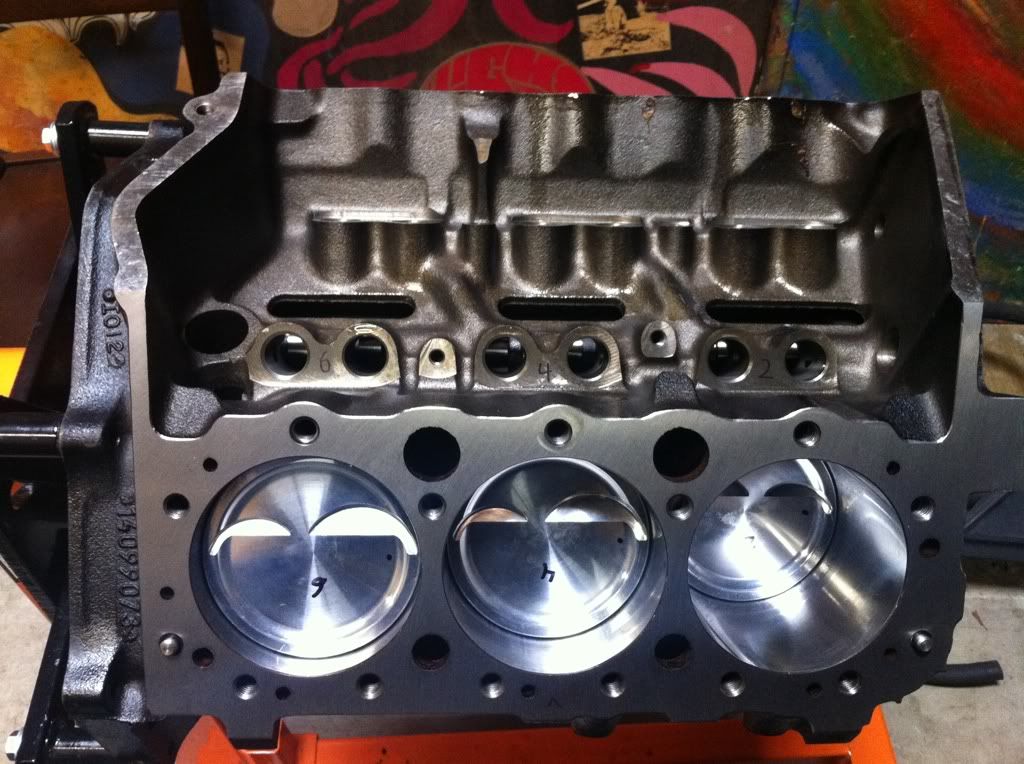
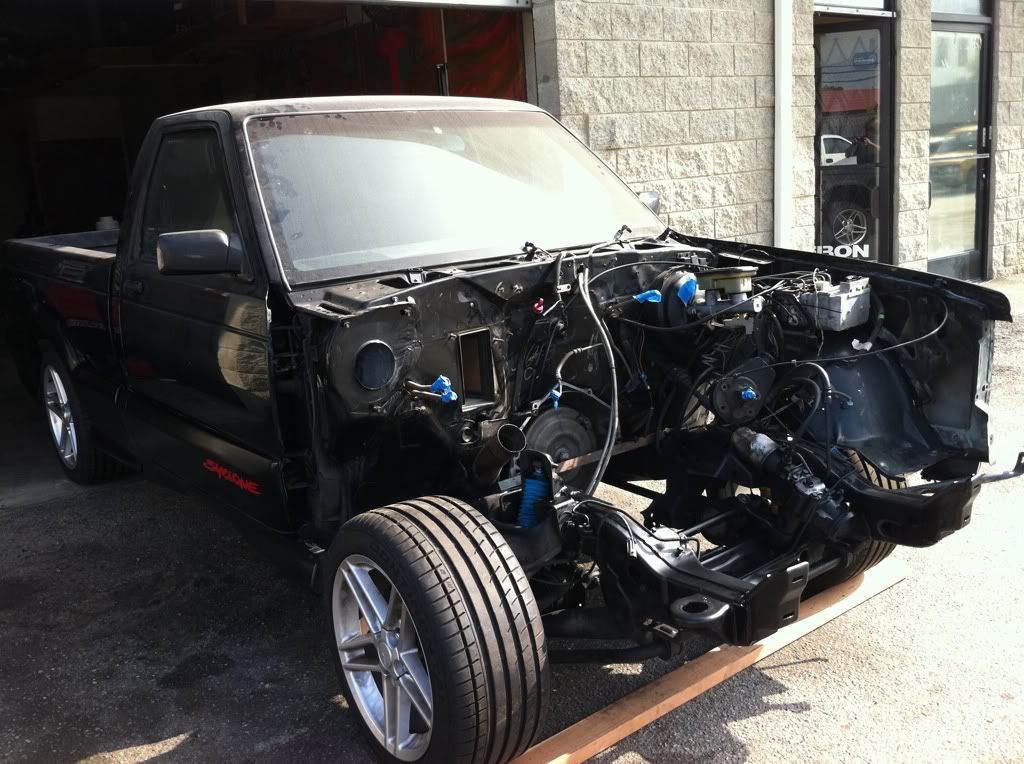
Since I had time to kill while waiting for parts I decided to put in new body mounts, paint the frame and clean the firewall and this is what I got. Not the cleanest in the world, but without the build taking many years and costing more than I can afford this will do and it actually looks pretty good!:D
f715d25d.jpg


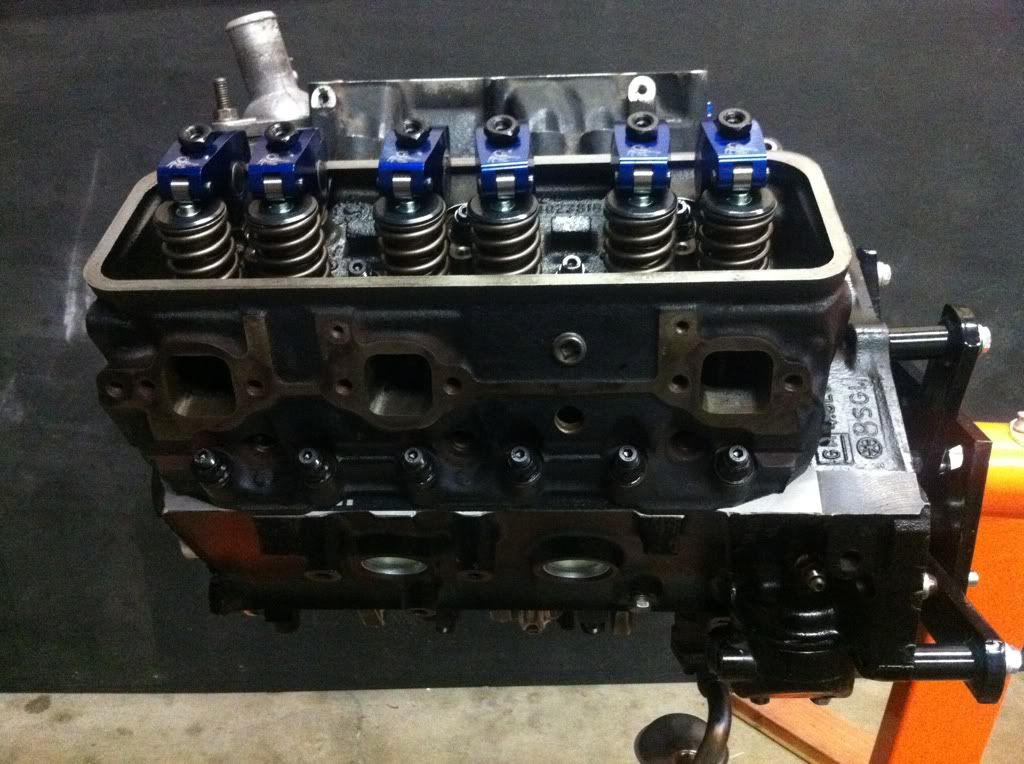
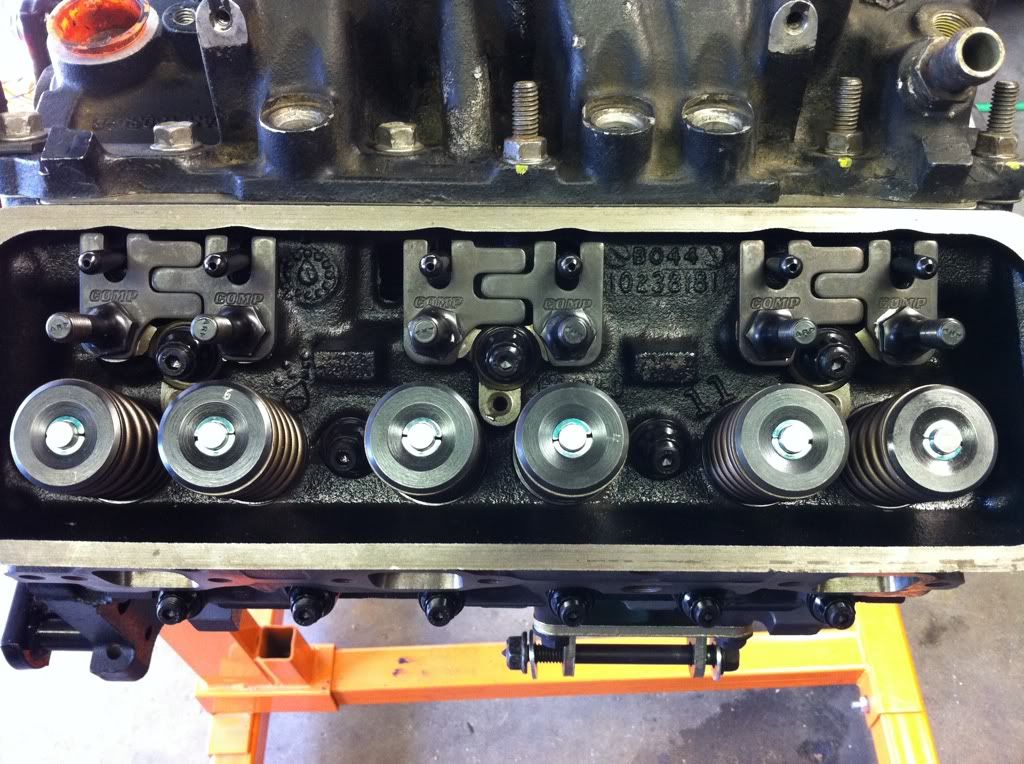
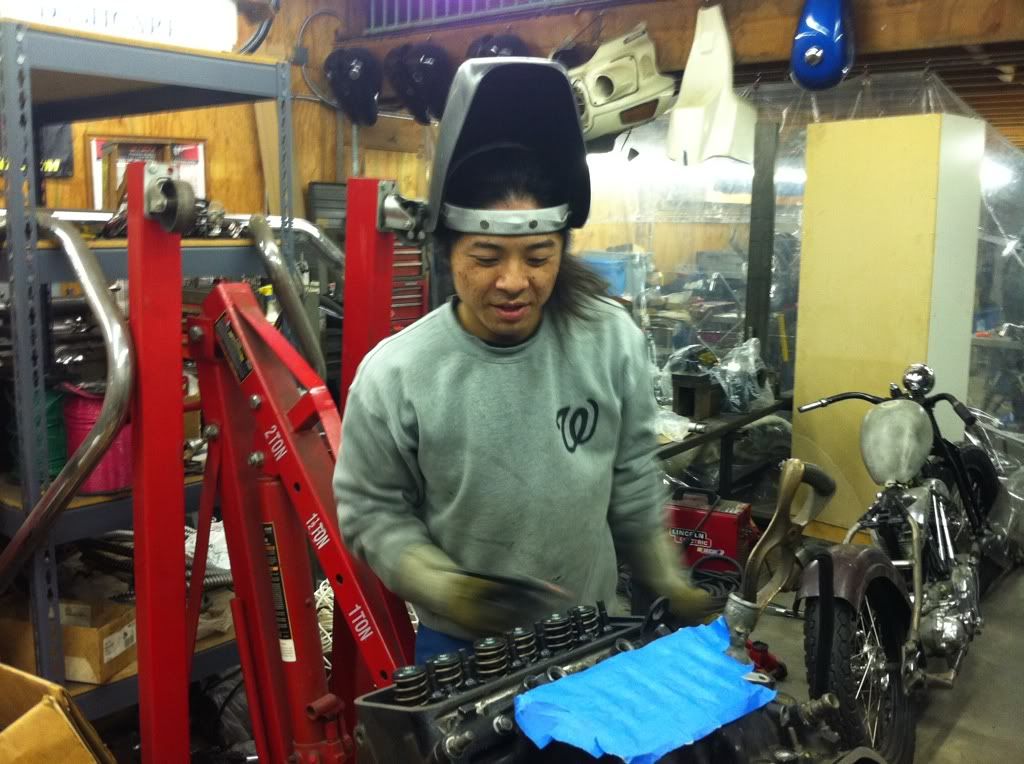
Now we get to the valve train which took a bunch of thinking time to get right. First issue was that I need to find a rocker stud with the M10 size to thread into the block and 3/8" for the Scorpion Roller Rockers, which I found from Comp Cams, but then stud was only getting 5 threads of engagement even with the guide plates raising them up a bit. The other problem I found it that the rockers were riding too far forward on the valve stem and almost rolls completely off the stem at full lift.

To solve both problems at once I had the idea of getting shorter push rods. I got some adjustable push rods and ended up finding out I needed a push rod exactly 7" in length to give me a safe amount of threads and keep the roller tip centered forward and back on the valve stem. Got that issue solved then find the next one.

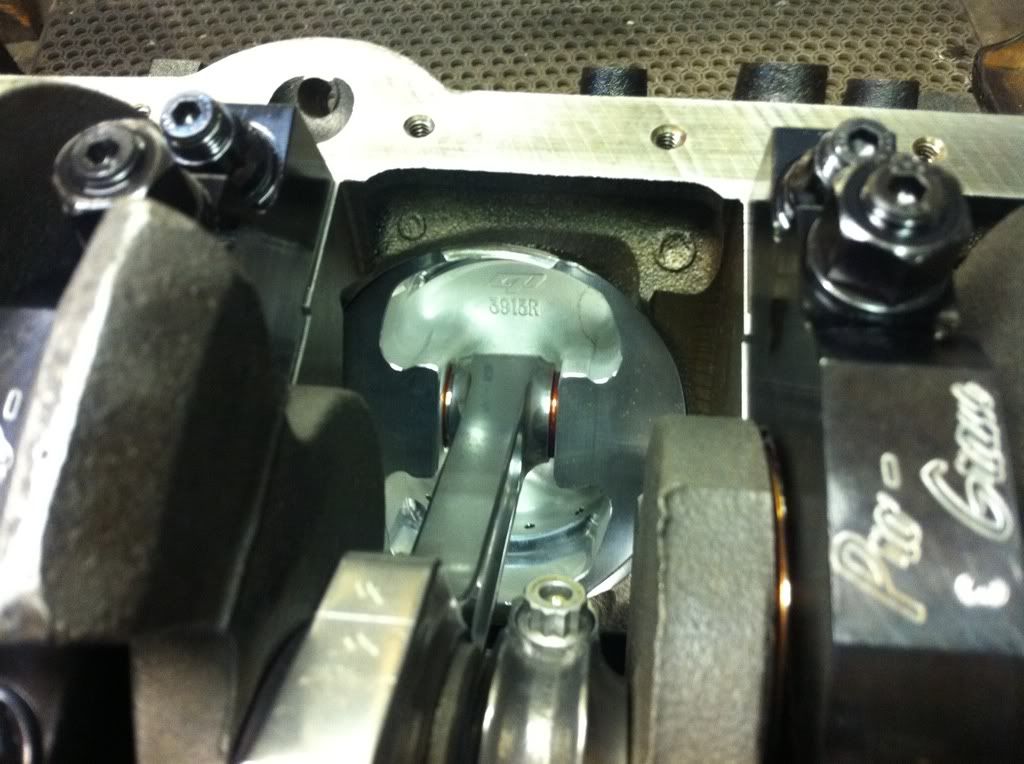
After that we noticed the rockers on the center cylinder heads would not open the valves with the rocker tip on the exact center left and right of the valve stem. They were aimed too far out from each other which we believed would cause premature wear on the valve train. You can somewhat tell from the picture what I'm talking about.
75b57e1e.jpg


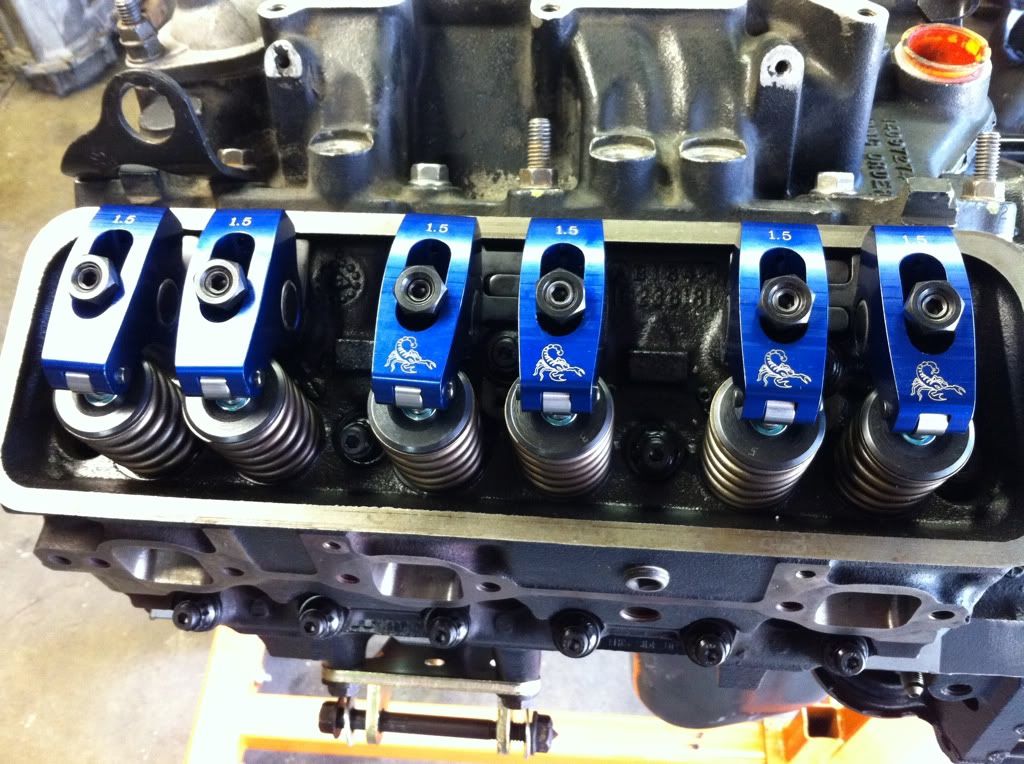
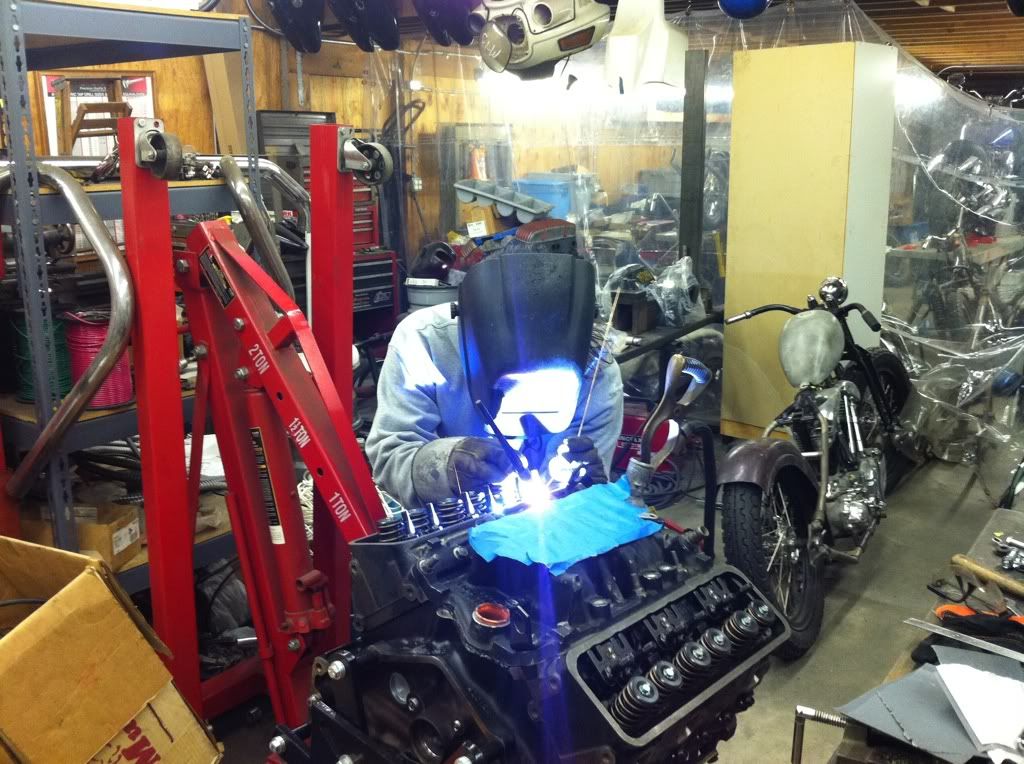
When Dave saw the problem he talked to Jeff (TwinTurboV8TY) and they came up with the idea of using Comp Cams width adjustable guide plates. Dave and I set those up today and were able to get them aligned absolutely perfectly! Now we just need to put a tiny spot of weld on each one to lock them together and keep then from losing their position. You can see in the picture that on the center cylinders guide plates have a bigger gap. I guess the push rod holes in the heads are spread out a little further on the center valves for some reason?:dunno:
96fc5b4c.jpg


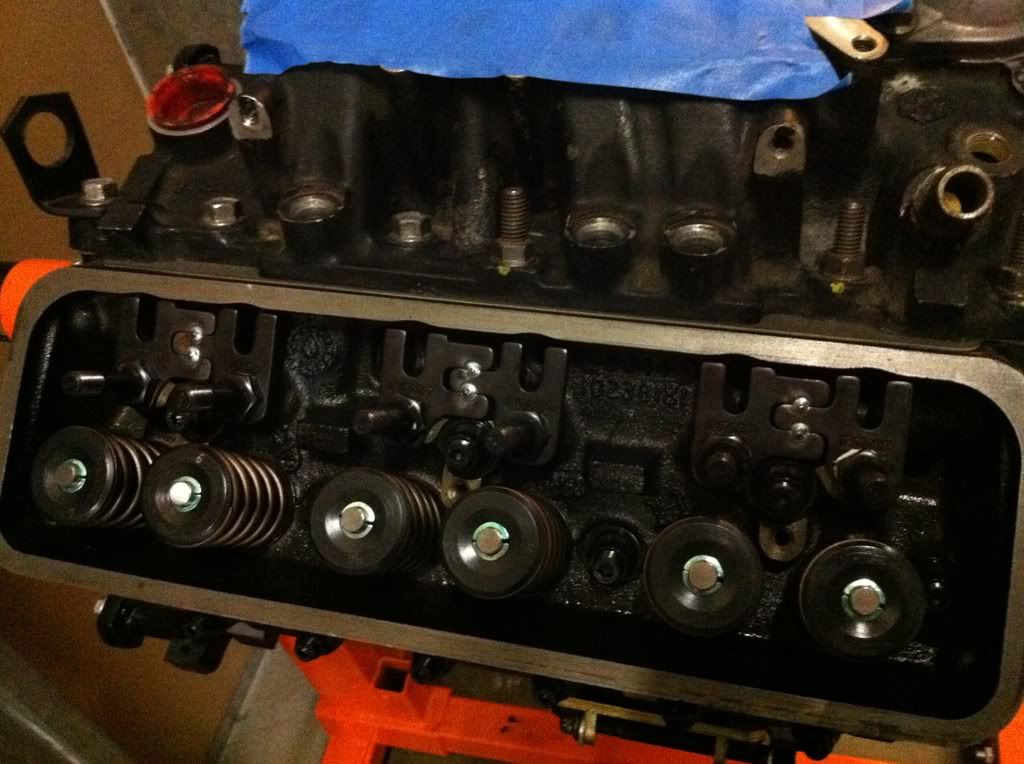
And now they all sit perfectly center!
752c063a.jpg


It really took quite a bit of work to get the heads right, but It should be well worth it! I think the list of parts bought for the valve train alone is about half of the entire list of engine parts and the cause of the obstacles I had to overcome on this engine.

Now the plan it to resume on the truck once I get back from my work trip to Georgia later this month. Then engines gotta get painted, accessories bolted on and put into its new home. Finally it may be just around the corner. Nothing I want more for Christmas than to hear the Syclone start up again! :tup:
 

DaveP

Active member
Re: Quinnster's Syclone 2208 Rebuild

Curious....what's the story on the motor in the background?

Good eye. Took some scrutinizing for me to see it. That pic was taken in my shop. There are several engines in it. The one behind Matt's engine is the one for DesertSy; one of my trucks. See the story from the weekend, here.
 

RealFastV6

@jb_and_his_coffee
Re: Quinnster's Syclone 2208 Rebuild

I'm sure Dave will tell you this- but just for posterity...

There is no motor that you can build that will survive detonation. Period.

It doesn't matter if you build a BowTie block with a billet crank and forged rods and pistons and run a stock turbo. If you detonate it, you will break it.

Kick ass build- drive on!
 

Ty92Resto

Member
Re: Quinnster's Syclone 2208 Rebuild

Good eye. Took some scrutinizing for me to see it. That pic was taken in my shop. There are several engines in it. The one behind Matt's engine is the one for DesertSy; one of my trucks. See the story from the weekend, here.

Very cool! Wish I could use my property to have a shop....too many stinking laws dictating what can and cannot be present on the property.

Those are very useful photos and will be staring at them when the motor gets pulled this spring to make sure I don't miss something.
 

DaveP

Active member
Re: Quinnster's Syclone 2208 Rebuild

I'm sure Dave will tell you this- but just for posterity...
There is no motor that you can build that will survive detonation. Period.

Matt and I have talked about this. He knows it. I know it. We all know it. IMO, the 'trick' is to get it tuned without blowing it up. I feel that with a cautious approach, and lots of logging, it can be done.

Personally, Ive never attempted a build quite like this before. My engines for both my personal use, and the ones I build for clients, are based on production parts, engineering, and utilizing factory ECM calibrations Then carefully assembled with attention to correct clearances, cleanliness, and attention to detail that result in reliable, leak-free assemblies.

Matt has done a good job of researching his build, and paying attention to advise given by several people involved with this build. There have been numerous set-backs, and pitfalls requiring a different approach, and again more money being spent. He's stuck with it. It's been a year since it blew. It will be awhile longer before it is ready to start.
Regardless of the final outcome, he's got my respect for sticking with it, and keeping it going.

I can assure you, I will do my best to assure we don't detonate it during or after the tuning process. I feel the "tuning process" never really ends. You keep logging, reading plugs, and making improvements for as long as you run it.... I've got a year of involvement in this build too. I don't wish to go backwards either.

DaveP
 
Re: Quinnster's Syclone 2208 Rebuild

quinnster nice truck man this thing is gonna be a real beast and that brake set-up is real nice. what size rotors are you running?
 

RealFastV6

@jb_and_his_coffee
Re: Quinnster's Syclone 2208 Rebuild

Matt and I have talked about this. He knows it. I know it. We all know it. IMO, the 'trick' is to get it tuned without blowing it up. I feel that with a cautious approach, and lots of logging, it can be done.

Personally, Ive never attempted a build quite like this before. My engines for both my personal use, and the ones I build for clients, are based on production parts, engineering, and utilizing factory ECM calibrations Then carefully assembled with attention to correct clearances, cleanliness, and attention to detail that result in reliable, leak-free assemblies.

Matt has done a good job of researching his build, and paying attention to advise given by several people involved with this build. There have been numerous set-backs, and pitfalls requiring a different approach, and again more money being spent. He's stuck with it. It's been a year since it blew. It will be awhile longer before it is ready to start.
Regardless of the final outcome, he's got my respect for sticking with it, and keeping it going.

I can assure you, I will do my best to assure we don't detonate it during or after the tuning process. I feel the "tuning process" never really ends. You keep logging, reading plugs, and making improvements for as long as you run it.... I've got a year of involvement in this build too. I don't wish to go backwards either.

DaveP

:tup:
 

QuinnSY

Donating Member
Re: Quinnster's Syclone 2208 Rebuild

Took the engine over to my neighbor to have the adjustable guide plates welded today.
15103c0e.jpg

714dc076.jpg


Thank you Mr. Tat!
86bbcd29.jpg


And also painted a few more brackets.
54f4a125.jpg


Now just to finish bolting on the accessories and put her in!
 
Top